• Home
  • Tutorials
    • MyMemories Tutorials >
      • Beginners >
        • Getting Started in My Memories
        • My Memories - Overview
        • Using MyMemories Templates
        • Using Outside Content in My Memories
        • Using a Photo as a Background
        • Quickpages >
          • Quickpages Introduction
          • Quickpages 1
          • Quickpages 2
          • Quickpages 3
          • Quickpages 4
        • Vellum Mat
      • Intermediate >
        • Making a Photo Template from an Outside Template
        • Using an Outside Template as a Sketch
        • Two Step Photo Block Pages
        • Circles on Rectangles
        • Making Sun Ray Shapes in MyMemories
        • Sun Ray Shapes 2
        • Totally Tropical Page
        • MyMemories Grouping Photos
        • Creating a Torn Background in My Memories
        • Making a Plaid Background in My Memories
      • Video and PDF Tutorials
    • Memory Mixer Tutorials >
      • Memory Mixer Quickpages 1
      • Using Outside Content In Memory Mixer
      • See Through Embellishments in Memory Mixer
      • Using Outside Template in Memory Mixer
      • Memory Mixer Speciality Fonts
      • Angled Photo Blocks in Memory Mixer
      • Adding MMS Templates to Memory Mixer
      • Photo Outlines 1
    • Advanced - Memory Mixer and MMS >
      • Rounded Corners on a Block of Photos
      • Making a Shadowbox in MMS
      • One Straight Corner, Three Rounded Corners
      • Photo Block In A Circle
      • Making A Pie
      • Making Cut Out Shapes in MMS
    • Design Ideas >
      • Long Tall Photos
      • Multiple frames with one photo
      • Repeated Photos
      • Page-Within-A-Page
      • 10 Photos Template
      • Clustered Borders
      • Reduced Opacity Backgrounds
      • Misplaced Frames
      • Really Big Titles
      • Lots of Squares
      • Same Photo Different Effects
      • Make Your Own Stacked Papers
      • Journal Cards
    • Photoshop Elements Tutorials >
      • Using Masks in PSE 11
      • Using Templates in PSE 11
      • Adding drop shadows in PSE 11
    • Paint Shop Pro Tutorials >
      • Using Masks in PSP X4
      • Extractions in Paint Shop Pro
    • Picmonkey Tutorials >
      • Saving Images in Picmonkey
      • Resizing Layouts for Tablet, Smart Phone etc
      • Separating Alpha Sheets
      • Recolouring PNGs in Picmonkey
      • Adjusting a background in Picmonkey
    • General Tutorials >
      • Adding a QR Code to your page
      • Making Peekaboo Cutouts With My Memories Shapes
  • Articles
    • General Scrapbooking >
      • Travel Scrapbooks >
        • Travel: Planning The Trip
        • Travel - Title Pages
        • Travel - No Photos
        • Scrapping On Your Phone
      • Memory Mixer or My Memories
      • Organising Your Stash
      • Building Your Stash With Freebies
      • Easy Peasy Facebook covers
      • English Lessons 1
      • Bad Photos
  • Software
    • Software Overview
    • MyMemories
    • Memory MIxer
    • Picmonkey
  • Pocket Scrapbooking
  • Albums
    • Cruises
    • Other Travel
    • Beaches
    • Day Trips
    • Smilebox Albums >
      • Cruises and Travel
      • Beaches and Day Trips
      • Home, Garden, Pets
      • Family
  • About Us
  • Links
  • Blog
Coastal  Scrapbooks

Saving Images in Picmonkey


You've done wonders editing your photo. Now what?

Click on Save at the top of the screen.
Picture
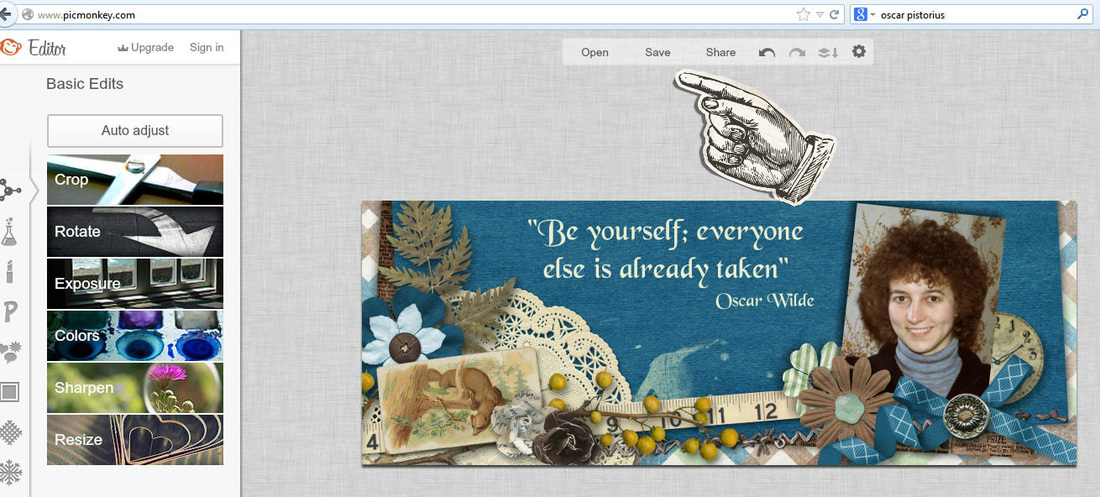
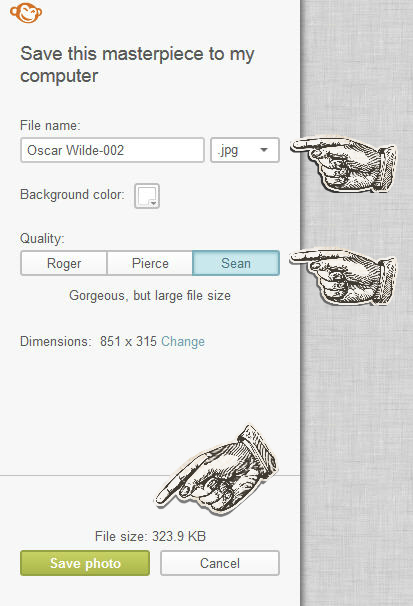
Make sure jpg is selected and the best quality image (the one on the right, his name is not always Sean!).

If you are going to save this edited version in the same folder as the original version you need to rename the image otherwise Picmonkey will overwrite your original, which means you lose the original. It will warn you before doing this. I usually add a few letters to say what I've done. In this example I'd add PMcr to the end so the new name would be Oscar Wilde-002PMcr. This would tell me I cropped it in Picmonkey.

If you are going to save the image in a different folder you don't need to rename it.
Picture
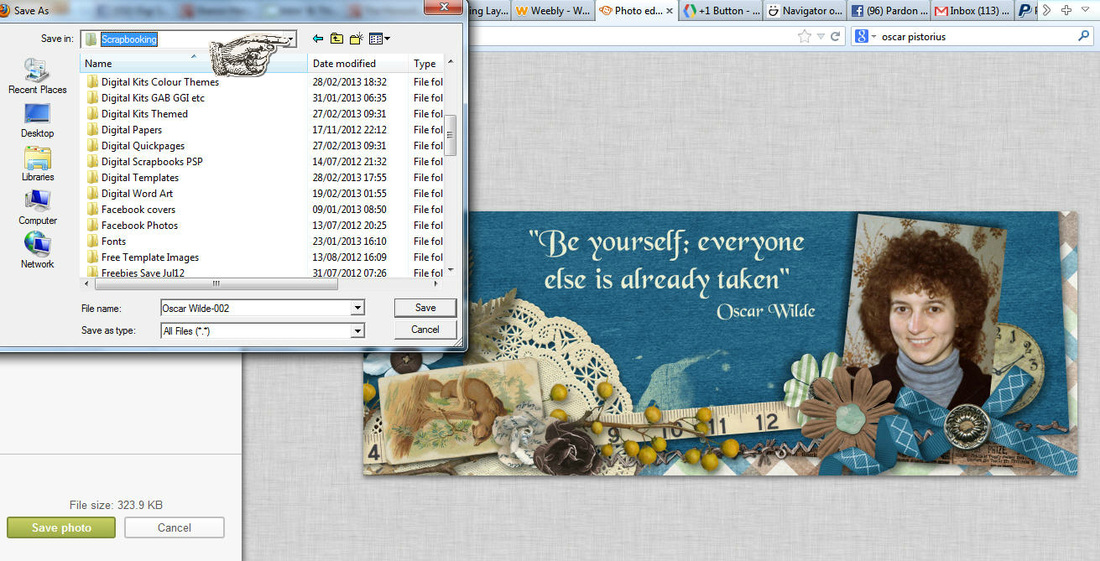
When you click on Save photo a window will appear so you can choose where to save it. Use the arrow at the top to browse through your folders.  Picmonkey will default to the last place you save a photo which is useful if you're editing and saving a batch of them.

Can't find your saved photo? What was the last one you saved? It might be in the same place;-)
Picture
When you click Save it will save your photo and you can close the image (X on the top right of the screen).

About this example ...

This particular piece of editing was done to make a Facebook cover. You can read how to do that on the Divas site HERE. The kit is Connie Prince's Remember When and the photo is me in about 1986!

Need help?

There are lots of people happy to help on the Digi Scrapping Divas group. There are also very good help pages in Picmonkey.

free counters
(c) Sharon Horswill and Coastal Scrapbooks. All Rights Reserved.