• Home
  • Tutorials
    • MyMemories Tutorials >
      • Beginners >
        • My Memories - Overview
        • Getting Started in My Memories
        • Using MyMemories Templates
        • Using Outside Content in My Memories
        • Using a Photo as a Background
        • Quickpages >
          • Quickpages Introduction
          • Quickpages 1
          • Quickpages 2
          • Quickpages 3
          • Quickpages 4
        • Vellum Mat
      • Intermediate >
        • Making a Photo Template from an Outside Template
        • Photo Outlines 1
        • Using an Outside Template as a Sketch
        • Two Step Photo Block Pages
        • Circles on Rectangles
        • Making Sun Ray Shapes in MyMemories
        • Sun Ray Shapes 2
        • Totally Tropical Page
        • MyMemories Grouping Photos
        • Making a Plaid Background in My Memories
      • Video and PDF Tutorials
    • Advanced - Memory Mixer and MMS >
      • Rounded Corners on a Block of Photos
      • Making a Shadowbox in MMS
      • One Straight Corner, Three Rounded Corners
      • Photo Block In A Circle
      • Making A Pie
      • Making Cut Out Shapes in MMS
    • Photoshop Elements Tutorials >
      • Using Masks in PSE 11
      • Using Templates in PSE 11
      • Adding drop shadows in PSE 11
    • Paint Shop Pro Tutorials >
      • Using Masks in PSP X4
    • General Tutorials >
      • Adding a QR Code to your page
      • English Lessons 1
  • Articles
    • What is Scrapbooking?
    • Travel Scrapbooks >
      • Travel: Planning The Trip
      • Travel - Title Pages
      • Travel - No Photos
      • Scrapping On Your Phone
    • General Scrapbooking >
      • Organising Your Stash
      • Building Your Stash With Freebies
      • Bad Photos
      • Optimising HTML Code
  • Design Ideas
    • Long Tall Photos
    • Multiple frames with one photo
    • Repeated Photos
    • Page-Within-A-Page
    • 10 Photos Template
    • Clustered Borders
    • Reduced Opacity Backgrounds
    • Misplaced Frames
    • Really Big Titles
    • Lots of Squares
    • Same Photo Different Effects
    • Matching Up
    • Make Your Own Stacked Papers
    • Journal Cards
  • Pocket Scrapbooking
  • Software
    • Software Overview
    • MyMemories
    • Memory MIxer
  • Albums
    • Cruises
    • Other Travel
    • Beaches
    • Day Trips
    • Sharon & John
  • Crafts
    • Machine Embroidery >
      • Getting Started in Machine Embroidery
      • Organising Your Embroidery Files
  • About Us
  • Links
  • Blog
Coastal  Scrapbooks

Adding Drop Shadows in PSE 11

Adding a drop shadow to digital elements will make your pages look much more realistic so here's a basic tutorial on how to do that in Photoshop Elements 11. The screens should look the same in PSE 12 but might not in PSE 10 and lower.

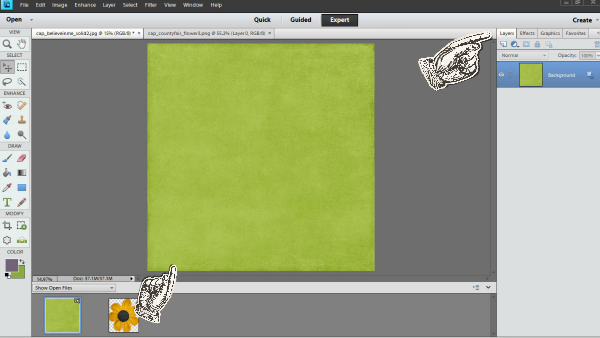
I've opened a background and an embellishment (flower from Connie Prince's County Fair). You can see both in the picture bin at the bottom of the main screen. Click on Select - the greyed out square in the left hand column in this picture - and drag the embellishment onto the background.
Picture
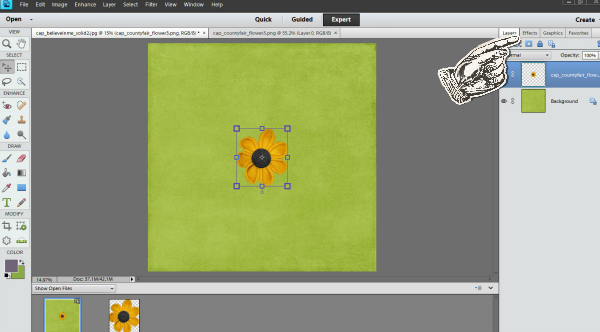
Make sure the embellishment is selected (it will have the lines and square around it) and click on the  Effects tab.
Picture
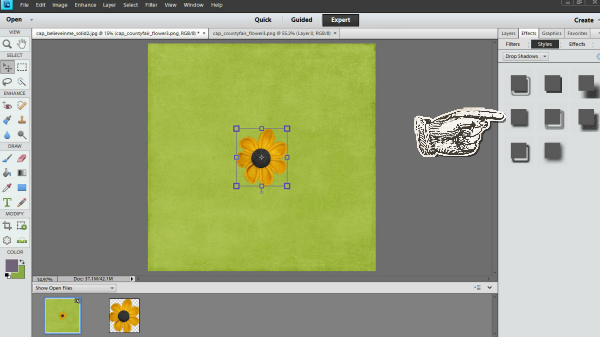
Double click on the style of shadow you want.
Picture
A shadow will appear using the default settings and you will see a fx symbol next to the layer in the layer palette. You might find the default shadow settings a bit harsh for scrapbook pages but you can alter them. With the shadowed element selected, click on the Layer tab at the top then choose Layer Style - Layer Settings.
Picture
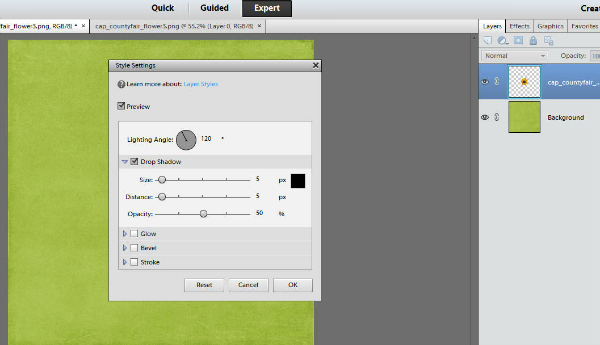
You will see this window appear. Think of the line for the lighting angle as pointing towards where the light is coming from. It is usually from the top left by convention so I leave it there unless I need the shadow to be in a different direction, for instance if there is a border at the bottom of the page.
Picture
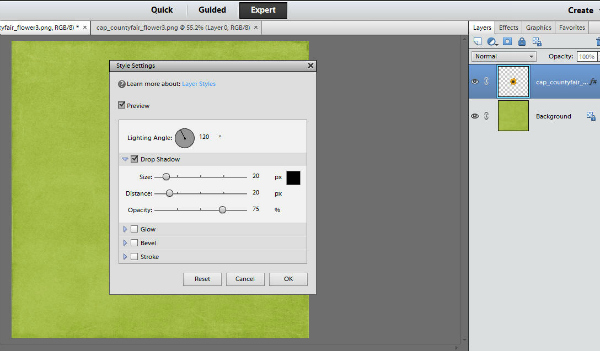
Move the sliders to get the effect you want. You will need to experiment to see what's best for the page you're making but I tend to make small shadows at first and adjust the levels like this:
Picture
Here's an enlarged picture of the embellishment so you can see the shadow:
Picture

free counters
(c) Sharon Horswill and Coastal Scrapbooks. All Rights Reserved.